How to set up Postfix on Debian 11 to use a mailhoster with SMTP

Tags: postfix, mailhoster, linux, smtp, netcup, relayhost
Last update: Aug 2022
Tested with: Proxmox 7, Debian 11, and Netcup or course

Important notes

  • Make sure you use your own hostname below. I used mx2f95.netcup.net only for testing purposes. This will not work for you. The hostname entry has to be identical to the entry in the password file sasl_passwd.
  • “said: 451 4.3.0 pymilter: untrapped exception in pythonfilter (in reply to end of DATA command)”
    In case you run across an error like this and your mails are not going to be sent out, then I strongly encourage you to try the -r switch followed by your source address, which overrides any ‘from’ variable specified in environment. There are some mailhosters like Netcup for instance, which are quite picky about the ‘from’ variable. I’ve spend hours and hours to find that out by testing every configuration you can imagine. For some completely unlogical reason the same error occured when the ‘mail content’ had too few characters. For instance just ‘content’ didn’t work.

Installation of packages

sudo apt install postfix mailutils libsasl2-2 ca-certificates libsas2-modules

Configuration of Postfix

sudo nano /etc/postfix/main.cf
relayhost = [mx2f95.netcup.net]:587
smtp_sasl_auth_enable = yes
smtp_sasl_password_maps = hash:/etc/postfix/sasl_passwd
smtp_sasl_security_options = noanonymous
smtp_tls_CAfile = /etc/ssl/certs/ca-certificates.crt
smtp_use_tls = yes

Configuration of the password file

sudo nano /etc/postfix/sasl_passwd
[mx2f95.netcup.net]:587 sourceaddress@domain.com:yourpassword
sudo chmod 400 /etc/postfix/sasl_passwd
sudo postmap /etc/postficx/sasl_passwd

Testing

echo "mail content" | sudo mail -s "Test" -a "From: Notification System<sourceaddress@domain.com>" destinationaddress@domain.com -r sourceaddress@domain.com

Troubleshooting

# you can check the mail logs
sudo tail -f /var/log/mail.log

# or even the system log if you need to dive deeper
sudo tail -f /var/log/syslog

# if the output is barely readable you can pass it to an optical highlighter
# make sure you install the lnav package first
sudo tail -f /var/log/mail.log | lnav

# if there is too much crap in terms of old mail entries you can flush the whole mail queue
sudo postsuper -d ALL

# if you just need to check the current queue list
sudo mailq

How to set up MSMTP on Debian to use a mailhoster with SMTP

Tags: msmtp, mailhoster, linux, smtp, tls
Last update: Jul 2022

Tested with: Debian 11

Steps

First we need to install packages:

sudo apt install msmtp mailutils

Note: mailutils is needed for sending mail via “mail” on the command line.

Edit the global configuration file:

sudo nano /etc/msmtprc

Fill up the configuration file:

# Set default values for all accounts.
account default
auth            on
tls             on
tls_trust_file  /etc/ssl/certs/ca-certificates.crt

# netcup
host            <yourMailHost>
port            587
from            <mail@domain.tld>
user            <user>
password        <pass>

aliases         /etc/msmtp-aliases

# Syslog logging with facility LOG_MAIL instead of the default LOG_USER
syslog LOG_MAIL

Create the aliases file:

sudo nano /etc/msmtp-aliases

with the following content:

# Send root mails to
root: <yourAddress>

# Send cron mails to
cron: <yourAddress>

# Send everything else to admin
default: <yourAddress>

Create the mail.rc. file:

sudo nano /etc/mail.rc

and fill it up with:

set sendmail="/usr/bin/msmtp -t"

If you need to check the logs in case of troubleshooting:

sudo tail -f /var/log/mail.log

Sources

  • https://decatec.de/linux/linux-einfach-e-mails-versenden-mit-msmtp
  • https://caupo.ee/blog/2020/07/05/how-to-install-msmtp-to-debian-10-for-sending-emails-with-gmail
  • https://mattsch.com/2021/05/12/setting-up-msmtp
  • https://manpages.org/msmtp

Change history

  • Jul 2022: creation

How to migrate some specific app profiles on macOS

Tags: macOS, migration
Tested on: macOS Big Sur, macOS Monterey
Last update: Nov 2021

If you migrate from one machine to another make sure you follow those steps and you’ll get rewarded with a hassle-free migration. Get a pendrive and copy the following files as zipped packages:

Google Chrome

file typepath and notes
main app/Applications/Google Chrome.app
cache files~/Library/Caches/chrome_crashpad_handler
app prefs~/Library/Preferences/com.google.Chrome.plist
main profile~/Library/Application Support/Google Chrome

Mozilla Thunderbird

file typepath and notes
main app/Applications/Thunderbird.app
(download from https://www.thunderbird.net/en-US/thunderbird/all/)
cache files~/Library/Caches/Thunderbird
~/Library/Caches/Metadata/Thunderbird
app prefs~/Library/Preferences/org.mozilla.thunderbird.plist
main profile~/Library/Thunderbird

Mozilla Firefox

file typepath and notes
main app/Applications/Firefox.app
cache files~/Library/Caches/Firefox
~/Library/Caches/org.mozilla.firefox
~/Library/Saved Application State/org.mozilla.firefox.savedState (if applicable)
app prefs~/Library/Preferences/org.mozilla.firefox.plist
main profile~/Library/Application Support/Firefox

Brave Browser

file typepath and notes
main app/Applications/Brave Browser.app
cache files~/Library/Caches/com.brave.Browser
~/Library/Saved Application State/com.brave.Browser.savedState (if applicable)
app prefs~/Library/Preferences/com.brave.Browser.plist
main profile~/Library/Application Support/BraveSoftware

If you copy those files and folders in your new user account unser the same subpath your Thunderbird will continue to operate as if nothing had happened.

How to inspect network traffic on your cell phone / mobile device

Tags: analyze traffic, mobile traffic investigation, mitm proxy attack
Last update: Feb 2021

Foreword
In this tutorial we will use a regular computer with two USB wifi adapters: one for the connection to our internet/wan and the other one for creating our local wifi hotspot. You can substitute one of the wifi adapters with an ethernet adapter of course. I’m using two wifi adapter in order to not mess around with cables and because they were laying on my shelf. Pretty all others should work, too.

1. Used hardware / software

  • some computer with Ubuntu 20.04 LTS installed (Linux Mint also worked)
  • usb wifi adapter #1: TP-Link TL-WN321G (chipset RT2501/2573)
  • usb wifi adapter #2: TP-Link TL-WN722N (chipset AR9271)
  • you’ll need to install the proxy tool: sudo apt-get install mitmproxy

2. Setting up the wifi adapters

I’m using Ubuntu or Mint for this first steps because it’s quite easy to set it up with GUI’s. For other distributions this way might differ a bit.

Turn on the wifi hotspot for the first wifi adapter.

For the sake of this tutorial we’ll keep things easy and use “monitored” as SSID and “internet” as password.

You should see something like this in the end.

The second adapter will be connected with the internet/wan. Namely called “guest”.

3. Checking the connections and parameters

It’s important to check the output of “ifconfig” just to make sure everything has been set up correctly.

wlx6470022a323f: flags=4163<UP,BROADCAST,RUNNING,MULTICAST>  mtu 1500
        inet 192.168.179.68  netmask 255.255.255.0  broadcast 192.168.179.255
        inet6 fe80::1927:4d17:ceef:b47a  prefixlen 64  scopeid 0x20<link>
        ether 64:70:02:2a:32:3f  txqueuelen 1000  (Ethernet)
        RX packets 6106  bytes 6409739 (6.4 MB)
        RX errors 0  dropped 0  overruns 0  frame 0
        TX packets 4896  bytes 1197861 (1.1 MB)
        TX errors 0  dropped 0 overruns 0  carrier 0  collisions 0

wlx940c6de46be3: flags=4163<UP,BROADCAST,RUNNING,MULTICAST>  mtu 1500
        inet 10.42.0.1  netmask 255.255.255.0  broadcast 10.42.0.255
        inet6 fe80::d6fe:b25f:3863:244e  prefixlen 64  scopeid 0x20<link>
        ether 94:0c:6d:e4:6b:e3  txqueuelen 1000  (Ethernet)
        RX packets 183  bytes 27080 (27.0 KB)
        RX errors 0  dropped 0  overruns 0  frame 0
        TX packets 384  bytes 60515 (60.5 KB)
        TX errors 0  dropped 0 overruns 0  carrier 0  collisions 0

What do you learn from this console output? Several important things:

  • wifi adapter #1 is accessible by its name “wlx6470022a323f”
  • wifi adapter #1 owns the local IP 192.168.179.68 from the guest-testing network with access to the internet
  • wifi adapter #2 is accessible by its name “wlx940c6de46be3”
  • wifi adapter #2 own a local IP 10.42.0.1 without any further access right now

4. Enabling routing and setting up the firewall rules

Now we need to enable IP forwarding.

sudo sysctl -w net.ipv4.ip_forward=1

And add some firewall rules for wifi adapter #1: wlx6470022a323f

sudo iptables -t nat -A PREROUTING -i wlx6470022a323f -p tcp --dport 80 -j REDIRECT --to-port 8080
sudo iptables -t nat -A PREROUTING -i wlx6470022a323f -p tcp --dport 443 -j REDIRECT --to-port 8080

Afterwards we need some additional rules for wifi adapter #2: wlx940c6de46be3

sudo iptables -t nat -A PREROUTING -i wlx940c6de46be3 -p tcp --dport 80 -j REDIRECT --to-port 8080
sudo iptables -t nat -A PREROUTING -i wlx940c6de46be3 -p tcp --dport 443 -j REDIRECT --to-port 8080

5. Starting mitmproxy

In order to be able to watch the traffic you need to start the sniffing host/proxy.

Start the proxy with: mitmproxy --mode transparent --showhost

You’ll find an empty window because no device is connected with our hotspot named “monitored”.

6. Connect with a mobile phone

Take your mobile phone and connect to our hotspot “monitored”. As soon as we connect, the network traffic should be visible. Is this case we can see some default Android behavior.

If you try to connect to an encrypted website on your mobile phone, you’ll get some error message at the bottom, that a (TLS) Client Handshake failed. In order to make this encryption visible we need to install an intermediate encryption certificate on our phone which is provided by our tool mitmproxy: Open up the browser on your phone and open the website “mitm.it”. You’ll be redirected automatically to a page where you can choose to download and install the certificate (depending on your device).

How to install a privacy friendly Jitsi Meet on Ubuntu and run it securely

Tags: jitsi installation, secure, ubuntu, linux
Last update: Jan 2021

Prerequisites

  • a fresh installation of Ubuntu 21.04 LTS or Ubuntu 18.04 LTS
  • verify all updates are installed by issuing
sudo apt-get update && sudo apt-get dist-upgrade && sudo apt-get autoremove
  • If you intend to run Jitsi on your new publicly accessible server, reachable under meet.yourdomain.com, you should change the name of your host accordingly in both files and reboot your machine:
sudo nano /etc/hostname
sudo nano /etc/hosts
  • These instructions also take care of the TLS certificate. If the server is meant to be in your own infrastructure, you should ensure that at least ports 80 and 443 can be reached from outside for creating the TLS certificate. That is easily overlooked.

Configuring the firewall

# allow HTTP, HTTPS and UDP datagram for Jitsi communication packets
sudo ufw allow 80/tcp
sudo ufw allow 443/tcp
sudo ufw allow 4443/tcp
sudo ufw allow 10000/udp

# allow SSH if you need it
sudo ufw allow 22/tcp

# enable firewall and check status
sudo ufw enable
sudo ufw status

Installing Jitsi packages

First we need to import the official Jitsi repository:

# importing the repo
echo 'deb https://download.jitsi.org stable/' | sudo tee /etc/apt/sources.list.d/jitsi-stable.list
# importing the encryption key for the repo
wget -qO - https://download.jitsi.org/jitsi-key.gpg.key | sudo apt-key add -

First we install the required packages:

# rebuildung the package list
sudo apt-get update
# installing needed packages
sudo apt-get install apt-transport-https jitsi-meet

You’ll be asked for the hostname of the current installation. Use meet.yourdomain.com.

Afterwards choose to generate a self-signed Let’s Encrypt certificate.

Obtaining a TLS certificate

We will use the builtin shell script for getting our certificate but it depends on the certbox package:

# installing lets encrypt's certbot
sudo apt-get install certbot

For reasons of simplicity and avoiding some common errors we use the prepared script for fetching the encryption certificate automatically. All we have to do is to provide our mail address.

sudo /usr/share/jitsi-meet/scripts/install-letsencrypt-cert.sh

Accessibility test

Point your preferred browser to https://meet.yourdomain.com and verify the installation. The page should be TLS encrypted and not showing any errors.

Avoiding abuse / configuring access control

By default the current installation of Jitsi is allowing everybody to enter our just created virtual meeting room without any access control. If you leave it in that state, anyone can connect to the server and transmit audio and video steams – even if no one else is inside the meeting. This inevitably leads to the server operator sending you an abuse notice and blocking your server due to high traffic. In a self-experiment, I experienced around 3000 GB of data running through my unsecured server. Don’t try this at home 😉

To restrict this abuse we’ll

  • enable accounts for us (authenticated users) and for all others (guests)
  • allow guests to join only if we have entered a certain room before

Turning on access control
We need to edit 3 files.

1. We turn access control on by changing the authentication type:

sudo nano /etc/prosody/conf.avail/meet.yourdomain.com.cfg.lua

by changing the block:

VirtualHost "meet.yourdomain.com"
    -- enabled = false -- Remove this line to enable this host
    authentication = "anonymous"

to:

VirtualHost "meet.yourdomain.com"
    -- enabled = false -- Remove this line to enable this host
    authentication = "internal_hashed"

and allowing guests to log in by adding at the end of the file:

VirtualHost "guest.meet.yourdomain.com" 
	authentication = "anonymous" 
	c2s_require_encryption = false

2. We edit a file belonging to Jitsi:

sudo nano /etc/jitsi/meet/meet.testprojects.me-config.js

by changing the block:

var config = {
    // Connection
    //

    hosts: {
        // XMPP domain.
        domain: 'meet.yourdomain.com',

        // When using authentication, domain for guest users.
        // anonymousdomain: 'guest.example.com',

to:

var config = {
    // Connection
    //

    hosts: {
        // XMPP domain.
        domain: 'meet.yourdomain.com',

        // When using authentication, domain for guest users.
           anonymousdomain: 'guest.meet.yourdomain.com',

3. We edit the Jicofo element:

sudo nano /etc/jitsi/jicofo/sip-communicator.properties

by adding a second line at the end of the file. From:

org.jitsi.jicofo.BRIDGE_MUC=JvbBrewery@internal.auth.meet.yourdomain.com

to:

org.jitsi.jicofo.BRIDGE_MUC=JvbBrewery@internal.auth.meet.yourdomain.com
org.jitsi.jicofo.auth.URL=XMPP:meet.yourdomain.com

Adding XMPP users
Now the access control is configured and we have to add users to XMPP/Prosody in order to authenticate ourselves and to create rooms:

sudo prosodyctl register <username> meet.yourdomain.com <password>

Restart everything
because we have finished configuration:

sudo systemctl restart prosody && sudo systemctl restart jicofo && sudo systemctl restart jitsi-videobridge2

Test your Jitsi installation

Point your browser again to https://meet.yourdomain.com and try to create a conference room. Usually (before our efforts above) a room would be created instantly and you could join. Now you are getting the hint that your room hasn’t been opened yet. Only you can open it by hitting the button to authenticate in order to allow others in.

Customizing your Jitsi installation

If you want to change the default branding you can edit the interface configuration file:

sudo nano /usr/share/jitsi-meet/interface_config.js

You might find the following line/settings useful:

# line 5 changes the page title
APP_NAME: 'Jitsi Meet',

# line 49 changes the logo within the room
DEFAULT_LOGO_URL: 'images/watermark.svg',

# line 50 changes the default name for guests
DEFAULT_REMOTE_DISPLAY_NAME: 'Fellow Jitster',

# line 51 changes the logo on the first page
DEFAULT_WELCOME_PAGE_LOGO_URL: 'images/watermark.svg',

# line 100 changes the animation of generic room names
GENERATE_ROOMNAMES_ON_WELCOME_PAGE: true,

# line 113 changes the logo link
JITSI_WATERMARK_LINK: 'https://jitsi.org',

# line 167 changes the visibility of existing rooms
RECENT_LIST_ENABLED: false,

Credits & further reading

Replacing a faulty disk in a software RAID1 array on Linux

Tags: linux, raid1, software raid, mdstat, md0
Last update: Jan 2021

Assumptions

We have a running software RAID1 at moint point /dev/md0 consisting of the following partitions:

  • /dev/sda1
  • /dev/sdb1

Showing details

You can get some detailed information about the fitness of /dev/md0 by issuing:

cat /proc/mdstat

An exemplary entry looks like this:

Personalities : [raid1]
md0 : active raid1 sdb1[1] sda1[0]
      136448 blocks [2/2] [UU]

and tells us that

  • it’s a raid1 array
  • md0 consists of sda1 (first part) and sdb1 (second part)
  • the raid1 is running synchronously > [UU]

If one partition of your raid fails then you will see underscores instead of the character ‘U’: [U_] or [_U] (depends on which partition is faulty).

Replacing a failed partition

For explanatory purposes we assume /dev/sdb1 to be faulty. If you want to replace the disk you have to follow the following steps:

(Optional) If your partition isn’t already marked failed you have to mark it failed:

sudo mdadm --manage /dev/md0 --fail /dev/sdb1

Then you can remove the faulty partition from the array md0:

sudo mdadm --manage /dev/md0 --remove

Remember: In our example we just have one partition per disk. If you have more than one partition belonging to multiple arrays, be sure to remove all partitions of that one particular disk which you want to replace. Example: another additional /dev/sdb2 could belong to /dev/md1.

Once all your partitions from the faulty disk are removed from all raid arrays you can replace the disk by replacing it with a new one. You should shutdown the system before 😉 Since this new one won’t be partitioned like the old one, we need to copy the partition structure from the disk which is still active in our array (/dev/sda). For copying a GTP partition structure from /dev/sda to our new /dev/sdb and creating a new UUID we can use:

# copy sda to sdb (GPT)
sudo sgdisk -R /dev/sdb /dev/sda
# create UUID
sudo sgdisk -G /dev/sdb

If you use classical MBR for disks below 2TB:

# copy sda to sdb (MBR)
sudo sfdisk -d /dev/sda | sudo sfdisk /dev/sdb

After having copied the partition structure we need to add the partition /dev/sdb1 back again to our array /dev/md0:

sudo mdadm --manage /dev/md0 --add /dev/sdb1

Now you can watch the progress of rebuilding your software array which is running completely transparent in the background until the target state of [UU] is reached again:

Personalities : [raid1]
md0   : active raid1 sdb1[1] sda1[0]
      1464725760 blocks level 5, 64k chunk, algorithm 2 [6/5] [U_]
      [==>..................]  recovery = 12.6% (37043392/292945152) finish=127.5min speed=33440K/sec

If you replaced a bootable disk (for instance /dev/sda) think about installing GRUB again. It might be helpful to copy the full boot partition (let’s say /dev/sda0) to /dev/sdb0 and to install GRUB also on /dev/sdb in order to allow booting from both disks.

# installing GRUB
sudo grub-install /dev/sda

Useful Linux commands

Tags: Linux
Last update: Aug 2022

  1. Compare binary files within the console and highlight those areas which differ. Vim and Colordiff have to be installed before.
diff -y <(xxd file.one) <(xxd file.two) | colordiff

2. Using a harddisk device for storing encrypted data with luks:

# creating luks partition
sudo cryptsetup luksFormat -c aes-xts-plain64 -s 512 -h sha512 -y /dev/sdX
# mount luks partition
sudo cryptsetup luksOpen /dev/sdX yourDeviceName
# create a filesystem within this luks partition
sudo mkfs.btrfs -L yourLabel /dev/mapper/yourDeviceName #(if you want btrfs)
sudo mkfs.ext4 /dev/mapper/yourDeviceName #(if you want ext4)
# if you want to mount it
sudo mount /dev/mapper/yourDeviceName /yourMountPoint


# generally speaking: mounting your filesystem
sudo cryptsetup luksOpen /dev/sdX yourDeviceName
sudo mount /dev/mapper/yourDeviceName /yourMountPoint

# generally speaking: unmounting your filesystem
sudo umount /dev/yourMountPoint
sudo cryptsetup luksClose yourDeviceName

3. Mirroring with rsync from /source to /destination. Compression is great when backing up over the Internet.

rsync --compress --compress-level=9 --human-readable -av --progress --delete --log-file=/path/to/log.file /source /destination

4. Wipe a file with zeros:

shred -fvzun 0 file

5. Wipe a directory recursively with zeros:

srm -rvs directory

6. Backup of harddisks into compressed image file. Due to its multithreading capability pigz is much faster than gzip during compression.

sudo dd if=/dev/sdX status=progress bs=1M | pigz > harddisk.img.gz

7. Restore this prior zipped image file and write it directly to disk:

sudo gunzip -c image.gz | sudo dd of=/dev/sdX status=progress bs=1M

8. Recover a Linux Soft-RAID md/5:

sudo mdadm --assemble --scan
sudo cryptsetup luksOpen /dev/md/5 temp
sudo mount /dev/mapper/temp /your_path

9a. Mount a Linux Soft-RAID manually:

sudo mdadm --examine /dev/sdX
sudo mdadm -A -R /dev/md9 /dev/sdX
sudo mount /dev/md9 /openedRaidPartition

9b. And close it again:

sudo umount /openedRaidPartition
sudo mdadm -S /dev/md9

10. List all loadable kernel modules:

find /lib/modules/$(uname -r) -type f -name \*.ko

11. Template for configuring a fresh manjaro xfce installation:

#update system
sudo pacman -Syyu
 
#install zshell
sh -c "$(curl -fsSL https://raw.github.com/robbyrussell/oh-my-zsh/master/tools/install.sh)"
sudo pacman -S powerline-fonts
 
#install virtualbox
sudo pacman -S virtualbox
 
#copy fonts which you need into /usr/share/fonts and run
sudo fc-cache
 
#fixing the Manjaro Linux XFCE text shadow problem on the desktop
xfconf-query -c xfce4-desktop -p /desktop-icons/center-text -n -t bool -s false

12. Nice to have Manjaro packages:
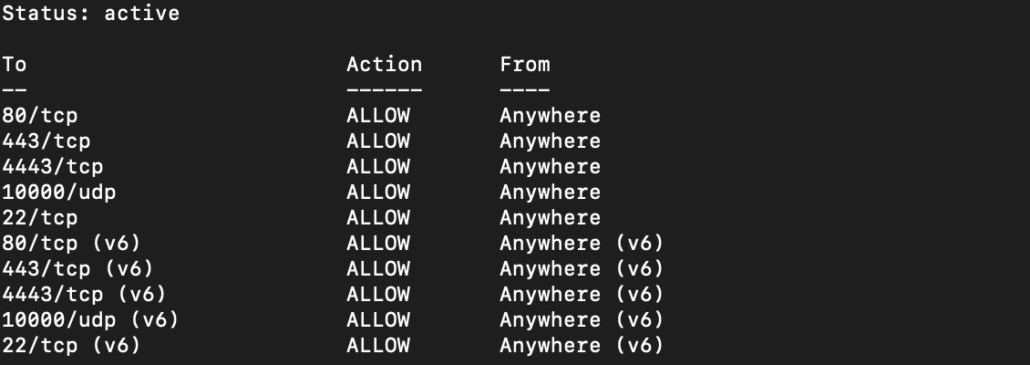
gufw (firewall gui)
chromium (browser)
synapse (launcher)
psensor (temperature)
ether (pendrive tool)
file-roller
p7zip zip unzip unrar
tilda (background terminal)

13. Laravel development quickstart:

git clone project.git
cd project
composer install
composer update
cp .env.example .env
php artisan key:generate
php artisan serve --port=8000

14. Restricting sFTP:

Add to /etc/ssh/sshd_config:

Subsystem sftp internal-sftp
 
  Match Group sftpusers
  ChrootDirectory %h
  ForceCommand internal-sftp
  AllowTcpForwarding no
  X11Forwarding no

Adding user and change configuration:

useradd newuser
usermod -s /bin/false newuser
chown root:root /home/newuser
chmod 755 /home/newuser
mkdir /home/newuser/writablefolder
chown newuser:newuser /home/newuser/writeablefolder
chmod 755 /home/newuser/writeablefolder
 
groupadd sftpusers
usermod -G sftpusers newuser
 
service sshd restart
service vsftpd restart

15. Replacing a broken harddisk (/dev/sda) with two partitions with RAID1 (md0 + md1):

#after having replaced the harddisk; copying MBR partition table
sfdisk -d /dev/sdb | sfdisk /dev/sda
#adding partitions to existing RAID-array md0 and md1:
sudo mdadm /dev/md0 -a /dev/sda1
sudo mdadm /dev/md1 -a /dev/sda2
#reinstalling grub on both disks again, leave options empty, select two disks (/dev/sda + /dev/sdb)
sudo dpkg-reconfigure grub-pc

16. Rsync command which doesn’t copy everything every time while preserving times:

rsync -avP source destination
#a = archive mode
#v = verbose
#P = show progress

17. Bash: iterate through all files within a specific folder and count its files

for i in /folderpath /folderpath ; do 
    echo -n $i": " ; 
    (find "$i" -type f | wc -l) ; 
done

18. copying KVM to PROXMOX

# converting image
qemu-img convert -f qcow2 -O raw image.qcow2 image.img

# creating VM in proxmox
qm create 120 --bootdisk scsi0

# importing disk to someStorage (as named in "pvesm status")
# importdisk adds the image as unused disk
qm importdisk 120 someImage.img someStorage

# attaching the image to the VM. still needs to be marked as boot device by hand
qm set 120 --scsi0 someStorage:vm-120-disk-0

19. repair a degraded ZFS pool/raid1 in PROXMOX

# "zpool status" output during normal operation

  pool: rpool
 state: ONLINE
  scan: none requested
config:

	NAME                                             STATE     READ WRITE CKSUM
	rpool                                            ONLINE       0     0     0
	  mirror-0                                       ONLINE       0     0     0
	    ata-SanDisk_SDSSDH3_2T00_193732800276-part3  ONLINE       0     0     0
	    ata-SanDisk_SDSSDH32000G_192970802134-part3  ONLINE       0     0     0

errors: No known data errors
# "zpool status" of degraded state if we unplug /dev/sdb manually

  pool: rpool
 state: DEGRADED
status: One or more devices could not be used because the label is missing or
	invalid.  Sufficient replicas exist for the pool to continue
	functioning in a degraded state.
action: Replace the device using 'zpool replace'.
   see: http://zfsonlinux.org/msg/ZFS-8000-4J
  scan: none requested
config:

	NAME                                             STATE     READ WRITE CKSUM
	rpool                                            DEGRADED     0     0     0
	  mirror-0                                       DEGRADED     0     0     0
	    ata-SanDisk_SDSSDH3_2T00_193732800276-part3  ONLINE       0     0     0
	    ata-SanDisk_SDSSDH32000G_192970802134-part3  UNAVAIL      3   212     0

errors: No known data errors

We see that the disk with ID ata-SanDisk_SDSSDH32000G_192970802134-part3 is not available any more. We have to do the following steps:

  • shutdown the server
  • plug in a brand new replacement disk
  • boot the server up again

You’ll see now another status:

  pool: rpool
 state: DEGRADED
status: One or more devices could not be used because the label is missing or
	invalid.  Sufficient replicas exist for the pool to continue
	functioning in a degraded state.
action: Replace the device using 'zpool replace'.
   see: http://zfsonlinux.org/msg/ZFS-8000-4J
  scan: none requested
config:

	NAME                                             STATE     READ WRITE CKSUM
	rpool                                            DEGRADED     0     0     0
	  mirror-0                                       DEGRADED     0     0     0
	    ata-SanDisk_SDSSDH3_2T00_193732800276-part3  ONLINE       0     0     0
	    14464946144281260868                         UNAVAIL      0     0     0  was /dev/disk/by-id/ata-SanDisk_SDSSDH32000G_192970802134-part3

We need to prepare the new drive and replace it:

# copy partition table from good /dev/sda to new /dev/sdb
sgdisk -R /dev/sdb /dev/sda
sgdisk -G /dev/sdb

# copy the bios and efi boot partitions
dd if=/dev/sda1 of=/dev/sdb1 bs=512
dd if=/dev/sda2 of=/dev/sdb2 bs=512

# replace command
zpool replace rpool ata-SanDisk_SDSSDH32000G_192970802134-part3 /dev/sdb3

Keep in mind: Never use the detach command to remove a disk from a pool, because by adding it again you might be not careful enough to add it in mirror function. The default behaviour is to add a disk in striping mode (raid0)! You’ll have to backup everything and to reinstall a mirrored array again from scratch. Useful commands are:

# show raid status
zpool status

# show all your disk IDs
ls -l /dev/disk/by-id/

20. How to fix the locale issue

perl: warning: Setting locale failed.
perl: warning: Please check that your locale settings:
  LANGUAGE = (unset),
  LC_ALL = (unset),
  LC_CTYPE = "UTF-8",
  LANG = "en_US.UTF-8"
    are supported and installed on your system.
perl: warning: Falling back to a fallback locale ("en_US.UTF-8").
sudo locale-gen en_US.UTF-8
sudo localedef -i en_US -f UTF-8 en_US.UTF-8

sudo nano /etc/environment

+export LANGUAGE=en_US.UTF-8
+export LANG=en_US.UTF-8
+export LC_ALL=en_US.UTF-8

Backup/sync files with 7-Zip CLI

Tags: Windows | Linux | 7-Zip Command Line Interface
Last update: Dec 2017

1. Foreword / Setting / Requirements

We want a quick and tiny script to initially backup our files secondarly to update our archive for example on a daily basis. We want to modify our archive only in case a file/folder has been changed.

As of today virtualization is in fashion because VM’s are quite easy to handle and they support nice things like snapshots and an easy migration for instance. So the possibility is quite high we have already a machine which is running an hypervisor somewhere at home or in the office. Therefore this cheatsheet is dealing with a VM.

Mandatory for this tutorial:
• 7-Zip CLI executable running on a Windows machine (7za.exe)
• basic knowledge about Windows’ Command Line

2. The single-line command

Short and beautiful:

path/to/7za.exe a -up0q0r2x1y1z1w2 -mx1 "path/to/archive.7z" "path/to/source"

3. Explaining the parameters

• path/to/7za.exe: Your place where 7za.exe is stored.
• a: Command to ADD files/folders to an archive.
• -up0q0r2x1y1z1w2: Options which actually enable 7-Zip to work as expected. This holy string consists of:
• -u parameter UDPATE
• p0 condition P: What to do if file exists in archive, but is not matched with wildcard? 0 = Ignore file (don’t create item in new archive for this file).
• q0 condition Q: NOT in source, but IN archive > 0 = Ignore file.
• r2 condition R: IN source, but NOT in archive > add and compress file.
• x1 condition X: in source OLDER, than in archive > copy file from old to new archive.
• y1 condition Y: in source NEWER, than in archive > copy file from old to new archive.
• z1 condition Z: file is identical > copy file from old to new archive.
• w2 condition W: same time but different size > add and compress file.

By the way: There is a very good documentation for 7-Zip out there.

-mx1 I prefer to determine the level of compression. It’s saving some time for data which is already highly compressed like movies, pictures and music.
Possible Values: 0 (none) | 1 (fast) | 3 (fast) | 5 (normal) | 7 (maximum) | 9 (ultra). Newer benchmarks are showing the time/compression ratio is best at level 3.

“path/to/archive.7z” Where the archive has to be stored. If your path contains any spaces, be sure to use quotation marks.

“path/to/source” Your file/folder which should be copied (recursively). Use quotation marks if there are spaces inside your path.

How to securely wipe your flash drive with Debian/Ubuntu Linux

Tags: Secure wipe, Linux
Last update: Dec 2017

First we want to fill up our pendrive with zeroes:

sudo cat /dev/zero > /dev/your_pendrive

After completion we can check if our flash drive is really wiped with zeros by installing and using a text-based Hex-editor:

sudo apt-get install ht

Remember: We trust nobody so we check manually if zeros have been written to the drive. If you see weird characters something went wrong.

sudo hte /dev/your_pendrive

How to setup a bridged OpenVPN VM on Windows 2012 R2 using Ubuntu 16.04.1 LTS

Tags: Windows 2012 R2 Standard | Hyper-V | Ubuntu 16.04.1 LTS | Bridged OpenVPN
Last update: May 2017

1. Foreword / Setting / Requirements

Sometimes we are travelling through the globe and imagine that on a particular day we are working onsite with our mobile device. Suddenly we recognize there are files missing which are quite important and we believe them to be on a shared drive in the office. Would be great to have a solution now – kind of remote access to our files…

As of today virtualization is in fashion because VM’s are quite easy to handle and they support nice things like snapshots and an easy migration for instance. So the possibility is quite high we have already a machine which is running an hypervisor somewhere at home or in the office. Therefore this cheatsheet is dealing with a VM.

Mandatory for this tutorial:
• installed Ubuntu 16.04.1 LTS Server
• installed Microsoft Server with Hyper-V (hypervisor for virtual machines)
• basic knowledge about Linux, Windows Server and IP networks, because we won’t explain every step too detailed

2. Creating the VM

• Create a second generation virtual machine with the following specs: 1 GB vRAM, 1 vCore, at least 10GB vSpace.
• Create a virtual switch which is associated to the external network, so your ethernet adapter of your server.
• Choosing a static MAC address for this VM will make it easier to remember. We need is in the following step.
• activate MAC spoofing for this virtual switch (important!)

3. Router configuration

• Bind your static MAC in the router to a parmanent IP address.
• You can already configure needed port forward to this IP. In this tutorial we are using ports 1194 and 5000.
• Choosing a static MAC address for this VM will make it easier to remember. We need it in the following step.

4. Ubuntu server

• Usual installation from image, tick just the SSH server in order to allow us to connect.
• We want to make sure all updates are installed:

sudo apt-get update && sudo apt-get upgrade
  • You can do a distribution upgrade if applicable:
sudo apt-get dist-upgrade
  • Now we need the packages for OpenVPN and the certs
sudo apt-get install openvpn easy-rsa

5. Generating certificates

• easy-rsa can be found at one of the following directories:
– /etc/openvpn/easy-rsa
– /usr/share/openvpn/easy-rsa
– /usr/share/easy-rsa
• Let’s generate a keyset for our server. Change into the prior mentioned easy-rsa directory and follow the instructions to generate our keys:

./build-ca
./build-dh
./build-key-server HOSTNAME_OF_YOUR_SERVER
  • Now we need a cert for the client:
./build-key HOSTNAME_OF_YOUR_CLIENT

You should find a subfolder “keys” with all just now generated files inside.

6. Setting up the bridge

• Create a new file: /etc/openvpn/openvpn-bridge

#!/bin/sh
 
# Define Bridge Interface
br="br0"
 
# Define list of TAP interfaces to be bridged,
# for example tap="tap0 tap1 tap2".
tap="tap0"
 
# Define physical ethernet interface to be bridged
# with TAP interface(s) above.
eth="eth0"
eth_ip="YOUR_SERVER_IP"
eth_netmask="YOUR_SERVER_NETMASK"
eth_broadcast="YOUR_NETWORK_BROADCAST_IP"
eth_gateway="YOUR_GATEWAY_IP"
 
case "$1" in
start)
    for t in $tap; do
        openvpn --mktun --dev $t
    done
 
    brctl addbr $br
    brctl addif $br $eth
 
    for t in $tap; do
        brctl addif $br $t
    done
 
    for t in $tap; do
        ifconfig $t 0.0.0.0 promisc up
    done
 
#    sleep ?
    ifconfig $eth 0.0.0.0 promisc up
#    sleep ?
    ifconfig $br $eth_ip netmask $eth_netmask broadcast $eth_broadcast
    sleep 1
    route add default gw $eth_gateway
    ;;
 
stop)
    ifconfig $br down
    brctl delbr $br
 
    for t in $tap; do
        openvpn --rmtun --dev $t
    done
 
    ifconfig $eth $eth_ip netmask $eth_netmask broadcast $eth_broadcast
    route add default gw $eth_gateway
    ;;
 
*)
    echo "Usage:  openvpn-bridge {start|stop}"
    exit 1
    ;;
 
esac
exit 0
  • Make it executable
chmod +x openvpn-bridge

7. Adding service to autostart

• Create or open file /lib/systemd/system/openvpn@.service and add two lines at the end of [Services] to make the service run at boot time:

ExecStartPre=/etc/openvpn/openvpn-bridge start
ExecStopPost=/etc/openvpn/openvpn-bridge stop

• OpenVPN status can now be checked by:

systemctl status openvpn@server.service
  • Restarting the service is of course possible via:
service openvpn restart

or:

systemctl restart openvpn@server.service

8. OpenVPN server configuration

• Create /etc/openvpn/server.conf with the following content:

#
# BASICS
#
mode server
tls-server
port 993
proto tcp
dev tap0
 
#
# CERTS
#
ca /etc/openvpn/keys/ca.crt
cert /etc/openvpn/keys/vpn.crt
key /etc/openvpn/keys/vpn.key
 
#
# ENCRYPTION
#
# Der zweite Parameter zu tls-auth lautet 0 beim Server und 1 beim Client
tls-auth /etc/openvpn/keys/static.key 0
dh /etc/openvpn/keys/dh2048.pem
 
#
# DHCP INFORMATION
#
server-bridge YOUR_SERVER_IP YOUR_NETWORK_MASK 192.168.1.201 192.168.1.210
push "dhcp-option DNS YOUR_GATEWAY_IP"
max-clients 3 #max concurrent connections
 
#
# OTHER
#
comp-lzo #should transfer be compressed?
cipher AES-256-CBC #choose encryption algorithm
keepalive 10 120 #keeping connection alive
client-to-client #authorises client to client connectivity
verb 3 #verbosity

9. Symbolic link to folder “keys”

• The syntax is: ln -s TARGET SOURCE

ln -s /usr/share/easy-rsa/keys keys

10. Reboot the VM

sudo reboot

11. Configuration of a windows client

• Config files of OpenVPN are located at C:\Program Files\OpenVPN\config
• Create a file in this folder called client.ovpn
• Fill it with the following:

# setting client or server mode
client
 
# providing IP of your VPN server (and a port if needed)
# if no port is set the default is UDP 5000
remote IP_OF_YOUR_VPN_SERVER YOUR_PORT
 
# port of your client. if nobind is set, default port 1194 will be used
nobind
 
# using the UDP or TCP protocol
proto tcp
 
# setting up the working mode: bridging (TAP device) oder routing (TUN device)
dev tap
 
# which adapter should be used? please provide the correct windows' name of the
# adapter to use. in this case we renamed it to "tap-bridge" before.
#dev-node tap-bridge
 
# which IP address should be used within our bridged VPN network?
#ifconfig 192.168.1.222 255.255.255.0
 
# where are the keys located?
# please keep in mind to use double-backslashes for a windows environment!
# for windows 7 additional quotation marks are required!
ca ca.crt
cert HOSTNAME_OF_YOUR_CLIENT.crt
key HOSTNAME_OF_YOUR_CLIENT.key
 
# the second parameter is: 0 = server, 1 = client
tls-auth static.key 1
 
# shall compression be used? if yes:
comp-lzo
 
# which encryption cipher has to be used?
cipher AES-256-CBC
persist-key
persist-tun
 
# accept data pushed by the server
pull
 
# setting a verbose level of 1
verb 1

• Copy your generated cert files from the server (/usr/share/easy-rsa/keys) into the client folder (C:\Program Files\OpenVPN\config), since they are needed for the client profile to work:

ca.crt
client.crt
client.key
static.key

Finish!